Good afternoon, my crafty friends! Today I am sharing my latest FlossTube video, where I show you my four finishes and my one WIP of several Heaven And Earth Designs patterns. All of the patterns I used are still available on their website, with the exception of Caron Vinson's work. Please be sure to become a follower of my blog so that you can see what I've been up to. Have an awesome day!
Saturday, March 30, 2019
FlossTube #05 - All Up In My HAEDs
Good afternoon, my crafty friends! Today I am sharing my latest FlossTube video, where I show you my four finishes and my one WIP of several Heaven And Earth Designs patterns. All of the patterns I used are still available on their website, with the exception of Caron Vinson's work. Please be sure to become a follower of my blog so that you can see what I've been up to. Have an awesome day!

Friday, December 7, 2018
The Coffee Oasis Blog Hop
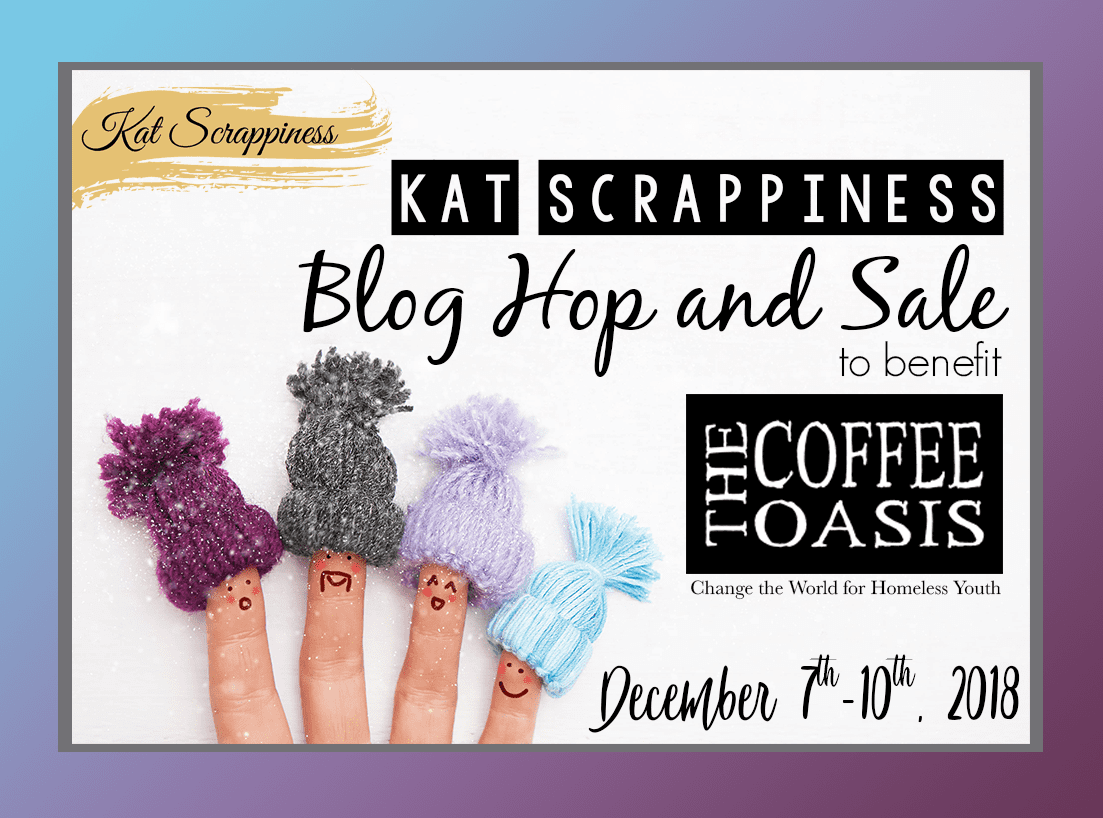
BLOG HOP PAGE STARTS HERE: http://katscrappinessblog.com/charity-blog-hop/
Hello, crafters! Cynthia here with a very special blog, dedicated to raising money for an extremely worthy cause. It's easy to overlook the daily blessings we all have, and take those blessings for granted. Now is our chance to spread some of the love to our greatest resource: our children! They are all, indeed, our future. Please consider making a donation to The Coffee Oasis, as well as joining this hop with your own blog post. There are lots of opportunities to win a wonderful prize, and your participation will also spread awareness about this amazing charity.

My winter-themed card features several Kat Scrappiness products, both new and old. I used the brand new Stitched Winter Swirl Backdrop Die, the "Snowflake Kisses" Brush Script Word Die, and the new Dark Blue Jewels. Let's take an in-depth look at the steps used to make this card.

My first step was cutting the backdrop die. I decided on this pretty dark blue card stock, which I thought would be a striking contrast for the white details I will be adding. This intricately patterned die is extremely easy to cut out, as the pattern is made of only tiny stitched lines - no fussing with tiny pieces! Thank you, Kat Scrappiness!

To accentuate all of the lovely details, I used my white gel pen to outline/fill in the pattern over the entire panel. This is fairly easy to do, and only takes a bit of patience. To add just the right touch of bling, I used the Dark Blue Jewels to outline the swirls at the top right and bottom left of the panel. I knew that I would be adding my word die to the center of the panel, but depending on your own design you could add more jewels to yours.

I then used the adorable "Snowflake Kisses" Die to cut my sentiment out of white card stock. I decided to do one of my favorite design tricks: layering dies to create dimension. Instead of trying to add tiny pieces of foam tape to the backside of the lettering, I simply cut out three word dies and glued them together. This gave me a sentiment that was much thicker, almost like a chipboard piece. You could add even more layers to make your own dies as thick as you'd like them 😊

When I first laid my sentiment directly on the snowflake panel, the background actually made the words a little harder to read than I liked. To solve this I cut a rectangular piece of vellum that was large enough to surround the die, then added a narrow rectangular frame in white. I was very careful to use tiny dots of paste adhesive to add the pieces to the vellum - you don't want to get any glue smears on it, trust me!

This is how the sentiment turned out. You can still see the design of the background, but it's been muted by the vellum to let the words stand out. The rectangular frame also focuses your attention to the words. You can also see that by layering my dies there is a shadow beneath them, again helping to draw your attention to them. I know it's hard to describe, but all of these subtle little things really do help your card to be the best it can be. Trust me, I'm a Design Team Member 😄

And that completes my card project! I hope that you enjoyed following along with me, and that I managed to explain my steps. Please be sure to head over to the Kat Scrappiness shop and grab these items for yourself - I've included a shopping link for you down below. By shopping with a small, independent business owner you are helping to support a hard-working woman with a deep passion for crafting and creation, and your business is greatly appreciated. Please also be sure to use my coupon code "CYNTHIA10" to receive 10% off your entire purchase, including the new releases. Take care of yourselves, and I will be back later in the month with more crafty goodness 💖
Monday, October 29, 2018
Halloween Scene Card for Kat Scrappiness

Good morning, all! Halloween is only a few days away, and I am getting more and more excited. I can't wait to see all of their kids and their costumes, and to hand out a bunch of candy.
I have a Kat Scrappiness Design Team project video to share with you (the link is down below this post.) In it, I use the Crafters Essentials FALL die set and the Toil & Trouble Layered stamp set. I used some Distress Oxide inks to color in my night sky, which is always so much fun to do. Please watch the video to see all the steps and details. Don't forget to click "Like" and subscribe to my channel if you haven't already.
Thank you, and have an awesome day!

YouTube Video link
Shopping link to Kat Scrappiness
Tuesday, August 21, 2018
Happiness Is Handmade Card
Hello again, crafters! I hope that you're all having a lovely day out there. We are still experiencing heavy smoke and traces of ash with all of the wildfires north of us, so we're staying inside with the air conditioning on. I feel terrible for the victims of the fires, of course. At least we only have minor health concerns to deal with!
Turning to a happier subject, I posted my Kat Scrappiness Design Team project over on the KS blog today. Please follow the link below to read the details. I'm really proud of the stamping and coloring on this background - I love it when a design idea works out! Here's a pic of the finished card:

Don't forget to use my discount code "CYNTHIA10" to receive 10% off your entire order!
MY Kat Scrappiness Design Team BLOG POST
Turning to a happier subject, I posted my Kat Scrappiness Design Team project over on the KS blog today. Please follow the link below to read the details. I'm really proud of the stamping and coloring on this background - I love it when a design idea works out! Here's a pic of the finished card:

To shop for the "Crafters Gonna Craft" stamp set, the Stitched Diagonal Backdrop die, or the White Jewels I used, follow this shopping link to get to the store: Kat Scrappiness website
Don't forget to use my discount code "CYNTHIA10" to receive 10% off your entire order!
MY Kat Scrappiness Design Team BLOG POST
Monday, July 23, 2018
Floral Card with Kat Scrappiness Crafters Essentials 1

Hello again, crafters! Thanks for joining me today for a look at a card project I recently made using the new "Crafters Essentials 1" from Kat Scrappiness. This amazing set of dies comes with 13 different pieces to mix and match to your heart's content. There are a ton of possible designs you could make with these dies, and I can tell that I will be reaching for these again and again in my craft room. Let's get into some details of my card design.

I decided to use the three-window rectangle die from the set to be my main element. I cut it out of Cotton Candy card stock and kept the three little window pieces. I will use one of them for my sentiment, and save the other two for future projects. I try to never throw away useful scraps - this can be an expensive hobby, and I try to make use of every scrap I have!

For my papers I chose two different patterns from the Penny Black "Beau Jardins" 6x6 pad. The leaf paper will be my background, and I cut the multi-flower paper in a strip to fit behind my pink frame. You could also cut your paper with the frame and then fit the pieces in like a puzzle, which would give you a seamless look.

Since I love adding ribbons to my cards, I chose this pretty Lemon Drop grosgrain ribbon from my stash (I'm sorry, it's not longer available for sale.) Because it's a bit thick, I decided to skip tying a bow and used a second little piece of ribbon to tie a simple knot. I also clipped the ribbon ends at an angle to finish them off.


Here is my card all finished! It really was quite simple, and a great way to use some pretty patterned papers. If you would like to purchase this wonderful set of dies, here is the shopping link to the Kat Scrappiness shop: KatScrappiness.com Don't forget to use the discount code "CYNTHIA10" during checkout to receive 10% off your entire order. Thank you for joining me today, and I will see you all soon.
SHOPPING:
- Crafters Essentials 1 die set from Kat Scrappiness
- Cotton Candy card stock from My Favorite Things
- Penny Black "Beau Jardin" 6x6 paper pad
- VersaFine Onyx Black ink
- Ranger Clear embossing powder
- "Springs Leaves" sequin mix from Kat Scrappiness
- "3mm Pink Heart Confetti" mix from Kat Scrappiness
- Laurel Burch "Fish Wishes" stamp set
Friday, June 29, 2018
Watercolor Wildflowers Card

Hello, crafters! Thank you for joining me today for a super-easy watercolor card project. I know when watercoloring on cards first became popular, I really hesitated because I felt like it was for "serious artists only." But please let me assure you that this is a technique anyone can do! All you need is some watercolor paper, water based inks of your choice (today I used Distress Inks), and the Everyday Brush Strokes stamp set. Let's get started!

I wanted to create a unique shape for my focal piece, so I decided to use my Kat Scrappiness Fancy Scalloped Stitched Border dies to cut along both the top and bottom of my watercolor paper. I wanted to cut the piece first and then stamp so that I could get my placement just right.

Since I was thinking of a field of wildflowers, I selected a pretty green and a blue ink for my stamping. Using one of the Brush Stroke stamps, I applied both colors of ink to it and then spritzed it lightly with my Mini Mister bottle. You just want the ink to bead up a bit, not dribble off the stamp.

I stamped the image all across the bottom half of my watercolor paper piece, double-inking and spritzing the stamp each time until I had filled my paper. I set it aside to dry completely, although you can speed up the process by using a heat tool. To give my scene a simple sky, I used more Distress ink that I watered down a bit and loosely brushed it across the top of my paper. I used an aqua brush for this, but any paintbrush would work as well.

The sentiment I chose was also from the Everyday Brush Stroke stamp set, and I stamped it with my favorite VersaFine black ink. This ink is a very rich, true black that stands out against everything and always gives a crisp impression. To create the look of a field of flowers, I used a fine tip permanent marker in black to create simple "stems" by flicking my pen up from the bottom, changing the angles and length slightly to avoid a uniform look. Some simple dots in black and then white ink finish the look.

I found a piece of pale blue card stock to use as a mat behind my focal, cut down to 4x5.25" so that it's slightly smaller than my A2 card base. To carry more green into the design, I added a strip of watercolor paper that I colored with the same Distress Ink as before. Making your own papers just by using inks is super quick and easy, and saves you the aggravation of never finding the perfect color to match your project. I decided to pop up my focal piece on foam dots so that it would stand out just a bit (maybe that blue was too perfect of a match!), and then dotted on some Nuvo Crystal Drops.

I hope that you enjoyed this card project and that it gave you some new ideas for the very versatile Everyday Brush Strokes stamp set. Please take a look at the other blog posts featuring these stamps and the other new items that Kat Scrappiness has. Have an awesome day!
Friday, May 25, 2018
Spring & Summer Coffee Lover's Blog Hop for Kat Scrappiness

Hello, crafters! Today I am bringing you my card project for the Coffee Lover's Blog Hop for Kat Scrappiness. This is a great event running from May 25th thru June 1st, hosted by Kat Scrappiness and open to all. I will provide more details at the end of this post, but first let's take a look at the steps I took to create this card.

Since this hop is focusing on Spring and Summer, I decided to use some colorful Doodlebug Designs chevron striped paper as the base for my coffee cup. The adorable Kat Scrappiness Layered Coffee Cup Die makes a nice-sized focal for any project, with realistic elements and layers for adding dimension. I used Kraft card stock for the coffee sleeve, and a nice bright white for the lid.

Once my coffee cup was assembled, I gathered together some kitchen themed stamps from my stash and stamped them out in coordinating inks of deep pink and turquoise blue. I wasn't too sure which images I would use (or what would fit into my design) so I stamped multiples in both colors to choose from. Believe me, the other images won't go to waste!

I selected a scalloped circle die and a plain circle die to create a little badge for my coffee sleeve. The sizing had to fit within the coffee cup edges or else it would look unbalanced, so I used the coffee canister and two cups for my grouping. I don't know what it is about these stamps, but I just love them! I think I'll make a few more of these just to have them on hand 😀

As you probably already know, I'm happiest when I'm creating my own custom backgrounds, and this project was no exception. I found the perfect turquoise and deep pink card stocks (both from Doodlebug Designs), and luckily found a chevron red rubber background stamp in my stash (it's awesome when that happens, isn't it?) I used VersaMark ink and Clear embossing powder for the stamping on these 4x2.5" panels. On the pink card stock I repeatedly stamped those two coffee cups to coordinate with my focal piece. If you'd like a more subtle look, just do the stamping with the VersaMark ink and set it aside to dry. You will get a lovely "watermark" look.

Another little trick of mine is to use my Copic alcohol markers to color small pieces of white card stock. Sometimes it's just easier to find the right color when you create it yourself. For the "Got Coffee?" Die I picked a lovely dark brown ink called Walnut #E59. I find it a bit easier to color the card stock before die cutting so that you don't accidentally warp your words or get your fingertips overly inky. I also like to use the scrap piece for lining up my words on my project. By laying the scrap down first, I can simply snug the die cut words right back where they came from for perfect placement.

My final embellishment was to add a few scattered sequins in brown and golden tones, dotted with Nuvo Glitter Drops in Chocolate Fondue and Honey Gold. And there it is - my finished card for the blog hop! I hope that you enjoyed this card, and that you'll give these awesome dies a try. Don't forget: join the blog hop and share your own coffee lover's project with Kat Scrappiness for a chance to win a $25 gift card for the Kat Scrappiness shop. Two lucky winners will be chosen for this, and a third random winner will be selected to receive BOTH the Layered Coffee Cup Die AND the "Got Coffee?" Die. There is also a special shopping code for this event. Enter "ILOVECOFFEE" as the discount code at checkout and receive 10% off your entire order. This event runs from May 25th thru June 1st, so be sure to jump in and join us before time runs out. Good luck, everyone!

Tuesday, February 6, 2018
New Design Team Member for Kat Scrappiness!

I'm so thrilled and excited to announce that I have been chosen as a new Design Team member for the fabulous Kat Scrappiness company! I will be creating blog posts, YouTube videos, and card challenges along with the rest of the Design Team throughout the coming year and into early 2019. This will be a year full of challenges and fun as I venture into a whole other side of paper crafting and social media. I will be posting quite a bit about what we're all doing, so now would be an excellent time to subscribe to my blog if you haven't already. Get your crafts supplies warmed up and jump into the party!
Wednesday, September 13, 2017
6 Cards 1 Kit - Simon Says Stamp August 2017 Card Kit
It's already time for another 6 Cards 1 Kit video! This month's Simon Says Stamp card kit featured Doodlebug Designs, which is one of my all time favorite companies. I can never get enough of all of their bright colors and adorable images - I want to collect everything :-) For the SSS card kit, Doodlebug released a custom set of papers and an adorable pack of enamel shapes that were inspired by their Fairy Tales collection. This collection features rainbows, unicorns, and birthday themes. Who wouldn't have fun with that?!

For my first card I wanted to use the JilliBean Soup tag and shaker element to create a card. I used my own inks and both the heart and line stamps to create a colorful pattern on the tag. I already had Doodlebug sequins mixes in my stash to fill up the shaker, then finished it with a sentiment strip and a bit of bakers twine.

My second card was inspired by all the adorable petite patterns from the papers. I picked out an assortment and cut tiny flags using some MFT dies. I also used my MFT alphabet dies to cut out the letters. A few holes and some twine for stringing helped me create the banners, and a little enamel cupcake sticker finished it off :-)

My third card was very simple. I used the fun banner paper to cut three simple rectangles, putting them on stitched card stock for framing. The center circle was stamped and colored with Copic markers, then embellished with more enamel stickers from the pack. So easy but so cute!

I really wanted to use this tiny "crowd" of animals for one of my cards, and it was only natural to give some of them balloons! I cut them with an MFT balloon die and attached "strings" of twine. The main balloon was made with another JilliBean Soup shaker element and filled with an assortment of black/white/clear sequins. I don't know about you, but I'd like these little guys to show up to MY next birthday!

The fifth card features a plaid paper I made by using the solid stripe stamp from the kit and pretty inks in green, blue, pink, and purple. I won't lie to you - this took some time and three tries before I got it right, but the end result is fabulous! I colored the tag with more of the same ink, then created a happy sky with more enamel stickers. Their sweet little smiles really make this card adorable, don't you think?

For my sixth and final card I decided to make a simpler custom paper by repeatedly stamping the Happy Birthday strip over a piece of orange patterned paper. Using my Misti stamping tool made this task extremely quick and easy. If you don't have a stamping tool yet, I would seriously consider getting one. Several companies offer them at different price points, so hopefully you can find one that fits your needs and budget. I created the colorful heart with stamping and more Copic coloring, adding Glossy Accents over top to give it the look of an enameled piece. I used the last stickers from my pack to fill each little window with yummy treats. Yay!

If you'd like to watch my YouTube video I created showing the assembly of these cards, please click the link here: YOU TUBE 6C1K SSS August 2017

For my first card I wanted to use the JilliBean Soup tag and shaker element to create a card. I used my own inks and both the heart and line stamps to create a colorful pattern on the tag. I already had Doodlebug sequins mixes in my stash to fill up the shaker, then finished it with a sentiment strip and a bit of bakers twine.

My second card was inspired by all the adorable petite patterns from the papers. I picked out an assortment and cut tiny flags using some MFT dies. I also used my MFT alphabet dies to cut out the letters. A few holes and some twine for stringing helped me create the banners, and a little enamel cupcake sticker finished it off :-)

My third card was very simple. I used the fun banner paper to cut three simple rectangles, putting them on stitched card stock for framing. The center circle was stamped and colored with Copic markers, then embellished with more enamel stickers from the pack. So easy but so cute!

I really wanted to use this tiny "crowd" of animals for one of my cards, and it was only natural to give some of them balloons! I cut them with an MFT balloon die and attached "strings" of twine. The main balloon was made with another JilliBean Soup shaker element and filled with an assortment of black/white/clear sequins. I don't know about you, but I'd like these little guys to show up to MY next birthday!

The fifth card features a plaid paper I made by using the solid stripe stamp from the kit and pretty inks in green, blue, pink, and purple. I won't lie to you - this took some time and three tries before I got it right, but the end result is fabulous! I colored the tag with more of the same ink, then created a happy sky with more enamel stickers. Their sweet little smiles really make this card adorable, don't you think?

For my sixth and final card I decided to make a simpler custom paper by repeatedly stamping the Happy Birthday strip over a piece of orange patterned paper. Using my Misti stamping tool made this task extremely quick and easy. If you don't have a stamping tool yet, I would seriously consider getting one. Several companies offer them at different price points, so hopefully you can find one that fits your needs and budget. I created the colorful heart with stamping and more Copic coloring, adding Glossy Accents over top to give it the look of an enameled piece. I used the last stickers from my pack to fill each little window with yummy treats. Yay!

If you'd like to watch my YouTube video I created showing the assembly of these cards, please click the link here: YOU TUBE 6C1K SSS August 2017
Tuesday, August 29, 2017
"Turtley Awesome" Distress Oxide Card
Hey there, crafters! This time around I am showing a card I made while playing with my Distress Oxide inks again. First of all, I was using a new-to-me technique of applying the ink pads directly to my paper. Here is a video showing this process in action:
Distress Oxides Direct To Paper Technique VIDEO
Once I had the pretty panel done, I decided to break out my brand new Newton's Nook "Waves" stencil. Using the Simon Says Stamp "White" pigment ink, I sponged over the stencil to create a soft, translucent layer of waves over the Oxide inks. Isn't it pretty?
The next step was to figure out which stamp set to use. I looked in my basket of new stamps and saw that I still hadn't used my Clearly Besotted "Cool Dude" stamp set featuring some very cute turtles. Perfect!
There are several sentiments that come in the stamp set, and for this project I chose two different ones. They're very cute, puny sentiments and I also like the font a lot. I colored the turtles with my Copic Markers, as well as the tiny orange fish, and accented the panel with strips of colorful dotted paper from Bella Blvd. So fun!

Distress Oxides Direct To Paper Technique VIDEO
Once I had the pretty panel done, I decided to break out my brand new Newton's Nook "Waves" stencil. Using the Simon Says Stamp "White" pigment ink, I sponged over the stencil to create a soft, translucent layer of waves over the Oxide inks. Isn't it pretty?
The next step was to figure out which stamp set to use. I looked in my basket of new stamps and saw that I still hadn't used my Clearly Besotted "Cool Dude" stamp set featuring some very cute turtles. Perfect!
There are several sentiments that come in the stamp set, and for this project I chose two different ones. They're very cute, puny sentiments and I also like the font a lot. I colored the turtles with my Copic Markers, as well as the tiny orange fish, and accented the panel with strips of colorful dotted paper from Bella Blvd. So fun!

Saturday, August 12, 2017
Layered Leaves "Thank You" Card
Hey, crafters! Today's video is all about how I made a simple Thank You card using a borrowed stamp and die set. My sweet mom was kind enough to let me borrow her Sizzix "Leaves" set. As soon as I saw it I knew I wanted to play with it - I'm a sucker for anything with leaves! Just to get my fingers inky, I did a simple stamping of the leaves themselves in Bamboo Leaves ink from Memento.

Then I stamped the outline in a rich Chocolate Brown ink from My Favorite Things.

I used the smaller outline die to cut out the entire vine, then used the larger outline die to cut a piece of black card stock. These layer together beautifully!


Once I put the floral paper down on the card base, I knew that I needed a nice oval piece for the center. My oval dies from Spellbinders are great, but I wanted something narrower because I didn't want to cover up the pretty flowers too much. This is where having a Silhouette Cameo really comes in handy! I figured out the ideal measurements of my ovals and simply created one that would fit perfectly. I cut this out of the pale purple dotted paper, then cut a slightly larger oval from white. For the scalloped piece, I found a round scalloped cut file in my library and simply resized it to fit my card. I could have found a scalloped oval in the Silhouette shop to avoid any distortions, but I wanted to use what I already had. I think it turned out cute!
Assembly was very easy with the pieces. I kept everything flat and only popped up the leaves with some foam squares. The finishing touch was 3 little iridescent bubbles in colors picked from the patterned paper. Voila!

Check out my card video on YouTube:
Supplies Used in this project:

Then I stamped the outline in a rich Chocolate Brown ink from My Favorite Things.

I used the smaller outline die to cut out the entire vine, then used the larger outline die to cut a piece of black card stock. These layer together beautifully!


Once I put the floral paper down on the card base, I knew that I needed a nice oval piece for the center. My oval dies from Spellbinders are great, but I wanted something narrower because I didn't want to cover up the pretty flowers too much. This is where having a Silhouette Cameo really comes in handy! I figured out the ideal measurements of my ovals and simply created one that would fit perfectly. I cut this out of the pale purple dotted paper, then cut a slightly larger oval from white. For the scalloped piece, I found a round scalloped cut file in my library and simply resized it to fit my card. I could have found a scalloped oval in the Silhouette shop to avoid any distortions, but I wanted to use what I already had. I think it turned out cute!
Assembly was very easy with the pieces. I kept everything flat and only popped up the leaves with some foam squares. The finishing touch was 3 little iridescent bubbles in colors picked from the patterned paper. Voila!

Check out my card video on YouTube:
Supplies Used in this project:
- Sizzix "Leaves" Stamp & Die set
- Sizzix "Tags & Words" Framelits & Stamps set (sentiment)
- Silhouette Cameo 3
- Neenah Solar White 80-lb card stock
- Recollections Black card stock (available at Michael's)
- DCWV Fresh Floral Stack patterned paper
- Memento Tuxedo Black ink
- Memento Bamboo Leaves ink
- My Favorite Things Chocolate Brown ink
- Queen And Company Iridescent Bubbles in Purple, Yellow and Blue
- Foam squares
- ATG Tape Gun
Tuesday, August 8, 2017
6 Cards 1 Kit - Simon Says Stamp July 2015 Card Kit
Hello there, crafters! My latest YouTube video features a quick look at an older card kit that I pulled from my stash. I have quite a few kits that I've either barely used, or not used yet at all! To remedy that situation, I decided to dust them off and make some videos about them.
The card kit is called "Sail Away With Me" and features the adorable "Sailing" stamp set. You also get 12 sheets of Authentique patterned papers, 5 sheets of card stock, a pack of Tim Holtz metal charms, and an accessory pack of twine, paper clips and a darling sailboat die. Let's take a look at each card I made in detail.


The card kit is called "Sail Away With Me" and features the adorable "Sailing" stamp set. You also get 12 sheets of Authentique patterned papers, 5 sheets of card stock, a pack of Tim Holtz metal charms, and an accessory pack of twine, paper clips and a darling sailboat die. Let's take a look at each card I made in detail.

CARD #1
For the first card I chose this fabulous striped paper featuring anchors, ships, knotted rope, seashells, and seahorses. To this I added a strip of red card stock stamped with chunky stripes and a slightly narrower strip of navy blue card stock. I then backstitched some of the twine to the navy paper and tied on one of the anchor paper clips. How fun!

CARD #2
For the second card I wanted to feature the life preserver image and make it look as though it were hanging on the side of a boat. I cut a rectangle of the soft blue card stock for the top of the card, and added narrow strips of MFT's "Kraft" card stock - inked with SSS Khaki ink and Distress Ink's "Gathered Twigs" to make it look more like wood. I added tiny dots of Nuvo Drops in Silver to mimic the look of rivets. I also used a horizontal strip of the same inked paper to make a railing.
For the bottom half of the card, I used a larger rectangle of the white card stock and stamped the sentiment and two stars. I stamped the life preserver separately on both the white and red card stock, then paper-pieced the red over the white for some dimension and interest. Then the ring was put on foam tape to pop it up a bit from the rest of the card. The final detail I added was some embossed horizontal lines on the white to give the idea of a painted wooden boat. Cute!

CARD #3
For my third card I wanted to create a bit of a scene. I made a simple frame with white card stock which was popped up with foam tape to create dimension. One of the clouds, the sailboat, and one of the waves were also popped up, while the other elements were attached flat. I also added a bit more twine around the panel and tied on the little compass charm. So cute!

CARD #4
My fourth card was quite a CAS (Clean and Simple) design where I let the colors do the talking for me. I really loved that bright red paper with the coral branch design! I flagged the ends of the paper strips and added a stitched rectangle of white to act as my focal. The little navy blue stars were cut with an older Lawn Fawn die, and the coloring was done with alcohol markers. The cute silver star charm tied with a tiny twine bow is the perfect finishing touch!

CARD #5
Another awesome paper from the kit was this pretty pale blue paper featuring delicate scrolls around a central anchor. I trimmed the paper to preserve the detail, then added a navy strip beneath it stamped in the chunky stripes. I used Lawn Fawn's stitched journaling tag die for the focal piece and punched out the sailboat shape, backing it with more navy blue card stock. The scattered dots were made with Nuvo Glitter Drops in "Silver Moondust." So pretty!

CARD #6
For my final card I just HAD to make a shaker! I used one of my favorite dies to create the tags, cutting out the center of the light blue tag and backing it with a piece of acetate and popping it up on two layers of foam tape for a bit more room. I put the second anchor paper clip in there, along with some 4mm Pretty Pink Posh sequins in three different colors. I know this one is a little busy with the multiple patterns, but the mostly monochromatic color scheme keeps things under control....I hope! 😀
Here is a more detailed list of the products I used to make these cards. Also, please watch the video below to see these cards coming together. Thanks for watching and Happy Crafting!
Simon Says Stamp "Sailing" Stamp Set
Simon Says Stamp "Soft Navy" card stock
Neenah Solar White 80-lb card stock
Memento Ink in Tuxedo Black
Memento Ink in Lady Bug
Memento Ink in Rhubarb Stalk
Simon Says Stamp "Khaki" ink
Distress Ink "Gathered Twigs"
Scotch 3M Foam Tape
VersaMark embossing ink
Hero Arts White embossing powder
Simon Says Stamp Fine Detail Clear embossing powder
My Favorite Things Stitched Rectangle STAX die-namics
Nuvo Glitter Drops in "Silver Moondust"
Nuvo Crystal Drops in Metallic "Silver Lining"
Pretty Pink Posh 4mm Sparkling Clear sequins
Pretty Pink Posh 4mm Aquamarine sequins
Pretty Pink Posh 4mm Cobalt sequins
Subscribe to:
Posts (Atom)
